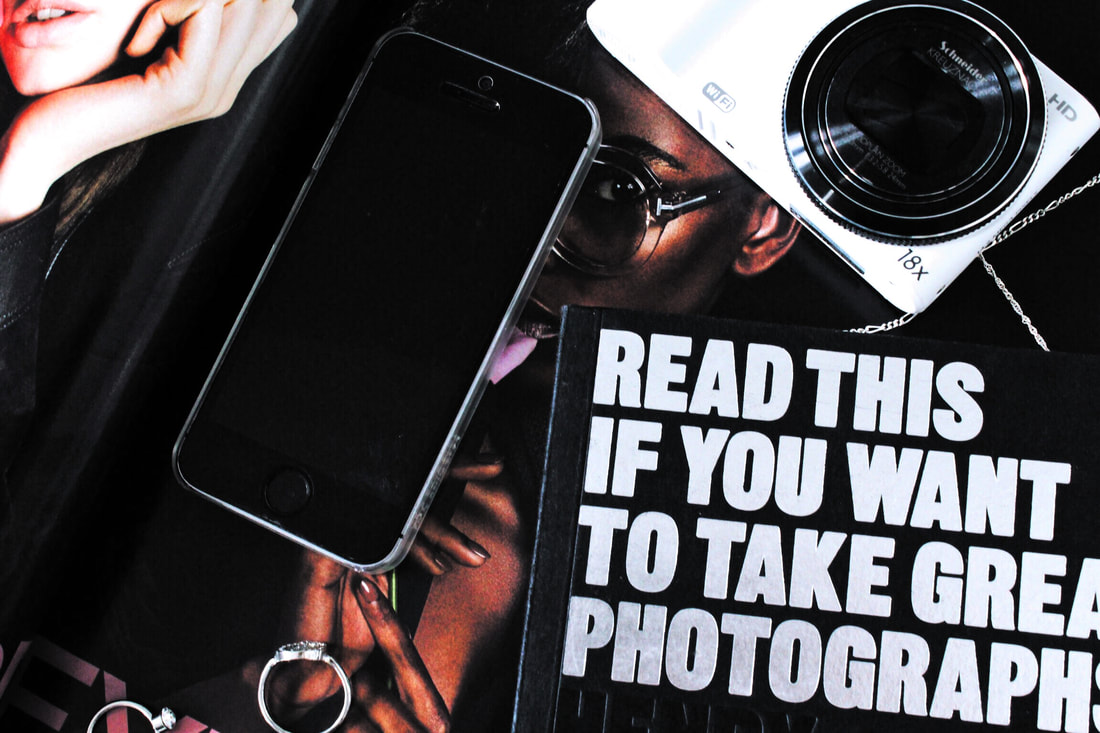
Those who know me know my undying love for photography, and in addition to the various books I've bought, I also decided to enrol myself in an online photography course last year to get the best out of my DSLR camera. Now, I don't class myself as a professional by any means- I simply have a passion for photography and wanted to share some of the basics that can help you (like it did me) take your photography to the next level! If you're more advanced, I doubt this'll be any use- but if you want to learn more about basics such as camera modes, types of camera and lens, exposure... scroll down!
G x
G x
T Y P E S O F C A M E R A
Photography has advanced greatly, and as a result... so have the cameras! As consumers and budding photographers, we have plenty of choice when it comes to picking the perfect camera- but which type is the best? Well here's a ever-so-quick rundown, because I don't want this post to be too long!
C O M P A C T / P O I N T A N D S H O O T C A M E R A S
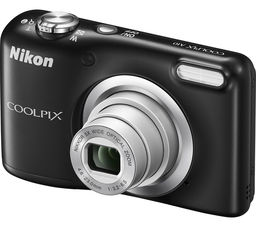
We've all seen (and probably had!) one of these before- not only are they the most affordable type of camera, apart from the good old disposable cameras, but they also appear to be great for on the go in terms of weight, unlike most of their counterparts! However, they can be limited in terms of creative control and not have as high apertures and shutter speeds- though on my compact camera, I do still have Av, Tv, M, P modes (which we'll get onto further below!) where I can control those settings.
D S L R C A M E R A S
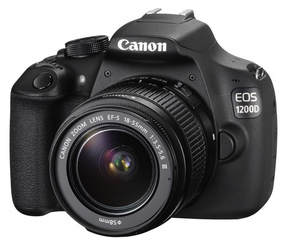
If we're going to get technical here, this stands for Digital Single Lens Reflex Camera and I'm sure you'll have seen a fair share of these around! This is quite possibly the most versatile time of camera you can get your hands on, with its many modes and features- and not to mention, these cameras can go to very high shutter speeds. While these can be expensive, there are more 'affordable' models such as my Canon 1200D. It's important to remember though, you don't need to have the fanciest camera model- because it's the lens that does a lot of the work, and a good one can go a long way!
B R I D G E C A M E R A S
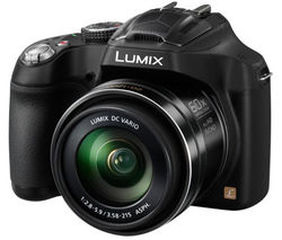
A bridge camera is often known as a step up from a basic compact camera, but not quite a DSLR. These lenses tend to have a much longer zoom range than other cameras, but not interchangeable lenses- unlike the DSLR. Nevertheless, they also have semi-automatic modes (Av, Tv, P) and most will also have a manual mode- but more on the modes later!
M I R R O R L E S S C A M E R A S (A L S O K N O W N A S C O M P A C T S Y S T E M
C A M E R A S)
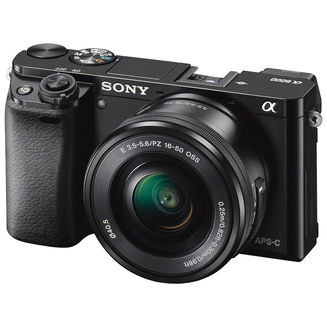
Mirrorless cameras are just that, they have a body similar to that of DSLR just without the complex mirror system- so they can be more compact and lightweight. Like with a DSLR, you can change the lens as well as having non-automatic, semi-automatic and automatic modes. If you want an article explaining more differences between a DSLR and CSC, click here
M E D I U M F O R M A T C A M E R A S
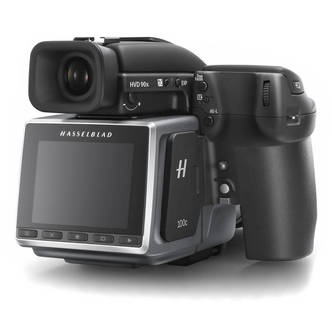
These cameras are the most expensive of the bunch, and can set you back thousands- they're most commonly used by professionals. Of course, all the modes apply here- but there are plenty of other advantages, such as the incredible picture quality, the ability for a very shallow depth of field, incredible low-light performance... the list goes on!
W H A T L E N S ?
Believe it or not, you don't need to buy the fanciest DSLR camera because your lens does a lot of the talking; many would recommend buying a second hand or less expensive camera, but then buy a good quality lens! There are many lenses out there, but which one do you buy if you're interested? Let me break down the different types and let you decide for yourself!
Z O O M L E N S E S
These do exactly as their name suggests, they have a variable focal length which allows you to get closer or further away from the subject by adjusting the lens- the focal length is represented by the mm you see on the lens, say 18-135mm: 18 would be a very wide focal length (as you can get a long distance) whereas 135 would be a very narrow focal length (as it is very close up).
P R I M E / F I X E D L E N S E S
These only have one focal length, say 50mm, and therefore cannot be used to zoom in or out. Despite their (usually) higher price point, they tend to produce higher quality, sharper images and are better for low-light photography.
These are the two categories of lens in terms of focal length, now let's get onto lenses divided by their angle of view. The angle of view is the concept that when we look straight without moving our head, we can see at an angle of about 130 degrees wide- but only 50 of which is in focus; with a camera, though, you are able to keep everything in focus.
S T A N D A R D / N O R M A L L E N S E S
These tend to have a focal length of about 50mm and give, roughly, the same view that our eyes see in focus when we look straight ahead- as explained above.
W I D E A N G L E L E N S E S
As the name suggest, these lenses capture a wider angle of view than we see- usually between 50 to 83 degrees- and come in focal lengths around 24-50mm.
U L T R A W I D E A N G L E L E N S E S
These tend to be lenses with a focal length less than 15mm, perfect for landscape photography- allowing to get the whole scene in focus.
T E L E P H O T O L E N S E S
This is a group of lenses with a focal length beyond 50mm and can allow you to zoom in very far- even 1000mm and beyond! However, this comes at a price and telephoto lenses tend to be expensive.
F I S H E Y E L E N S E S
These lenses usually have a 180 degree view- far wider than what we can see and allowing objects to become curved and distorted.
M A C R O L E N S E S
Some cameras may have a macro mode you may be aware of, it's the same principal- macro lenses are used to get up-close shots to small objects, perfect for wildlife photographers. Though, you may want to stick with your camera's mode here as these can get expensive!
E X P O S U R E
Ah exposure, the magical word which refers to how much light enters the camera! There are a couple more key terms here, do bear with me...
Overexposure is when the image is too bright and too much light has entered the camera- this causes highlights of the photo to become brighter, which loses detail and texture in the image as well as causing it to look washed out.
Underexposure is when the image is too dark and too little light has entered the camera- causing shadows to become darker and again, detail to be lost in the image. This can result in dull images.
Correct exposure is when the image represents the scene in terms of brightness and isn't too dark or too light.
However, it is important to remember that exposure is down to you and your personal opinion- and I know myself I have deliberately underexposed images for effect. Remember, photography doesn't have to be knowing the rules and following by the book- it's important to experiment and break the rules! So... how do you control exposure?
S H U T T E R S P E E D
As you may or not be aware, your camera has a shutter that controls how long the light enters the camera, the length of time the shutter is open is the shutter speed. The lower the shutter speed, the more light you let in (say 1"), whereas the higher the shutter speed, the less light you let in (say, 1/1000).
If you want to capture moving objects, however, you want to be using a high shutter speed as these can freeze movement and keep the frame in focus. If you want to blur your subject, you should be using low shutter speeds, such as 1". Remember, though, always use a tripod for shutter speeds lower than 1/60 as if not, you may get camera shake- which basically means your image is going to be blurry and not in focus!
This can be controlled in semi-automatic mode Time Value or in the Manual Mode.
Here's a little scale, curtesy of imagesandcameras.com:

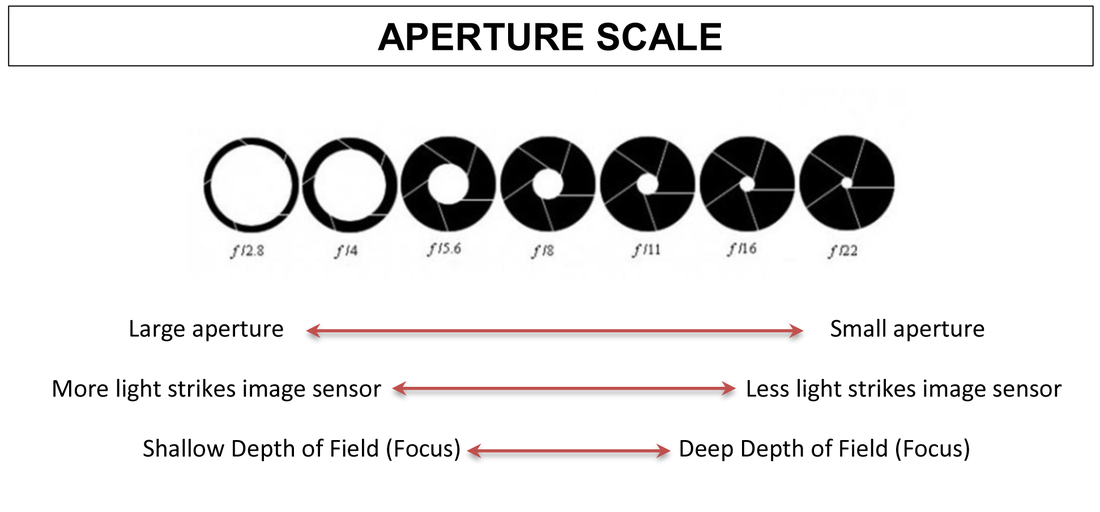
A P E R T U R E
The aperture controls how much light enters the camera, and is represented is F. Numbers or F. Stops (f standing for focal). The larger the number, the lower the amount of light let through whereas the lower the number, the more the light let through.
The main use of aperture though is to control the depth of field, or in other words... how much of the image is in focus. The lower the number, the shallower the depth of field (say f/2.8) meaning the background is likely blurred, and the higher the number (or f stop), the wider the depth of field meaning everything is in focus (say f/22).
This can be controlled in semi-automatic mode Aperture Value or in the Manual Mode.
Here's another scale, curtesy of the same website:
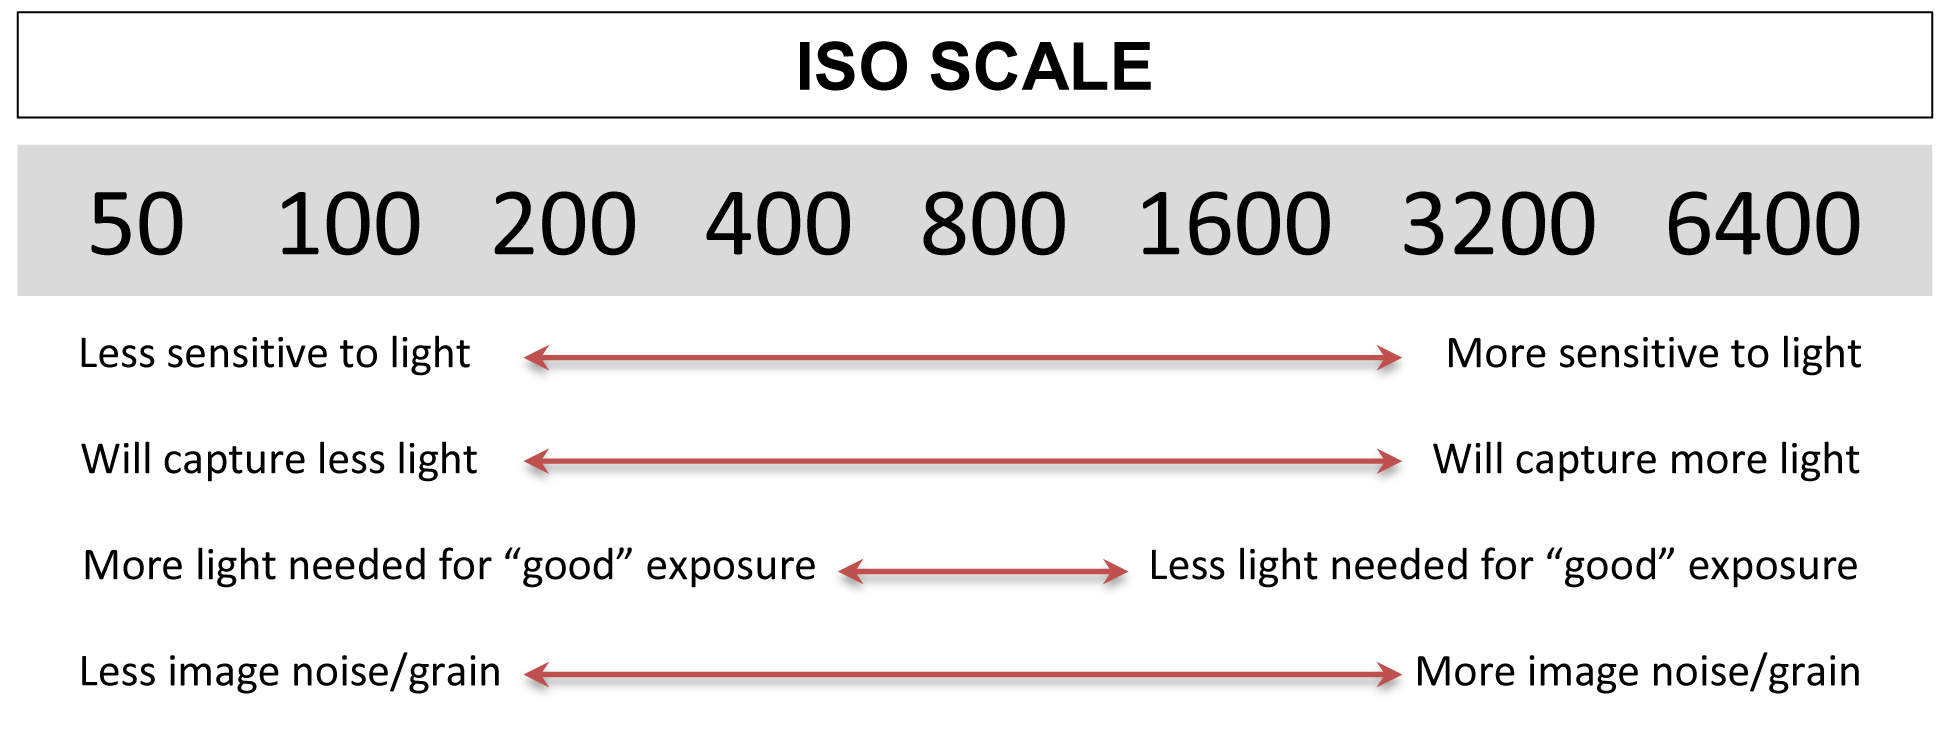
I S O
Finally, we have our good friend ISO which controls how sensitive the camera is to light. The lower the ISO, the less sensitive the camera is to light and the less light it lets in- in addition to this, the image noise is lower (so the image not grainy). The higher the ISO, the more sensitive the camera is to light and the more light it lets in- however, the image noise is much larger and the image quality hence is often poorer (appearing grainy). You would use low ISO's in bright conditions, and high ISO's in dark conditions.
You can control this in semi-automatic modes, such as Av, Tv and P as well as the manual mode.
Here's yet another diagram from https://www.emaze.com/@AZWRTTOO/The-Exposure-Triangle
You can control this in semi-automatic modes, such as Av, Tv and P as well as the manual mode.
Here's yet another diagram from https://www.emaze.com/@AZWRTTOO/The-Exposure-Triangle
E X P O S U R E C O M P E N S A T I O N
Now this... this is the easiest way to make an image brighter or darker as you please, all you have to do is scroll either side and take your photo! Scrolling towards the + (usually the right side) will make your photograph brighter and scrolling towards the - (usually the left side) will make it darker!
You can use this in semi-automatic modes and in manual mode.
Here's a scale from http://www.freedigitalphotographytutorials.com/camera-settings/how-to-use-exposure-compensation-camera-settings/
You can use this in semi-automatic modes and in manual mode.
Here's a scale from http://www.freedigitalphotographytutorials.com/camera-settings/how-to-use-exposure-compensation-camera-settings/

If you want some more little cheat sheets about how these work along and together, I'll leave a link to my Pinterest photography board here
C A M E R A M O D E S & F U N C T I O N S
Now you know about some of the basic concepts, we can move on to camera functions and which modes are best suited for which purpose- these are located on the camera's mode dial, which both compact (point and shoot) and DSLR cameras have (the cameras I am focusing on for this post).
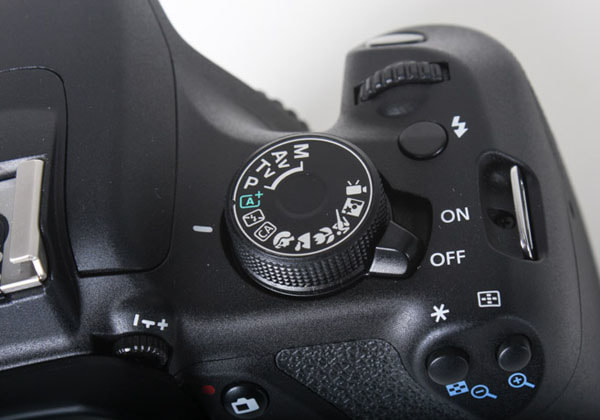
Image curtesy of hardwarezone.com
The first setting we're touching upon is the Manual Mode, to the top. This is a mode photographers use that allows them complete creative control over the photograph, allowing them to set the ISO, aperture, shutter speed... as they please- unlike semi-automatic or pre-set modes. This isn't the best mode to go if you're just starting out, so let's move down!
The next mode is called Aperture Value Mode/Aperture Priority, which is a semi-automatic mode that allows you to control the aperture while the camera adjusts the shutter speed itself. This is quite possibly the best mode to use for blog photos, because changing the aperture allows you to control how much of the frame you want in focus- perfect for that product close-up you want a blurry background for!
One down, and you have Time Value or Shutter Priority Mode- which again is a semi-automatic mode that this time, allows you to control the shutter speed while the camera controls the aperture. This mode is very useful when photographing moving objects, such as cars, as it makes sure they remain in focus- unless that is, you want to leave light trails or blur your subject!
Then, you have Program which is a semi-automatic mode that allows you to control the ISO while your camera controls the shutter speed and aperture.
Now, we come across the Fully Automatic Mode- which we've all used before! Here, you have no creative input, which could be good on the go- but perhaps not so good in other cases. Automatic mode tends to focus on getting the exposure right more than anything else, so you may find things being in or out of focus which you don't please!
One down, and we have Flash Off mode- again, an automatic mode just without the flash... quite self explanatory!
Then, we reach Creative Automatic Mode (or so on the Canon 1200D) which does all the hard work for you and just asks how blurry you want your background as well as the setting in which you're in and whether or not you want the flash on.
Now, we move to the pre-set modes which have certain features for certain scenes. Portrait and Close-Up Mode focus on having a low aperture to give a blurred background and allow the subject to stand out, whereas Landscape has a high aperture to get everything in the frame in focus. It's the same with Sports mode, it has a high shutter speed to get moving objects in focus!
Finally, we're down to our little filming mode, as you may, where you record videos.
C O M P O S I T I O N
In this post, I'll talk about two of my favourite compositional techniques- though there are plenty more if you look into it!
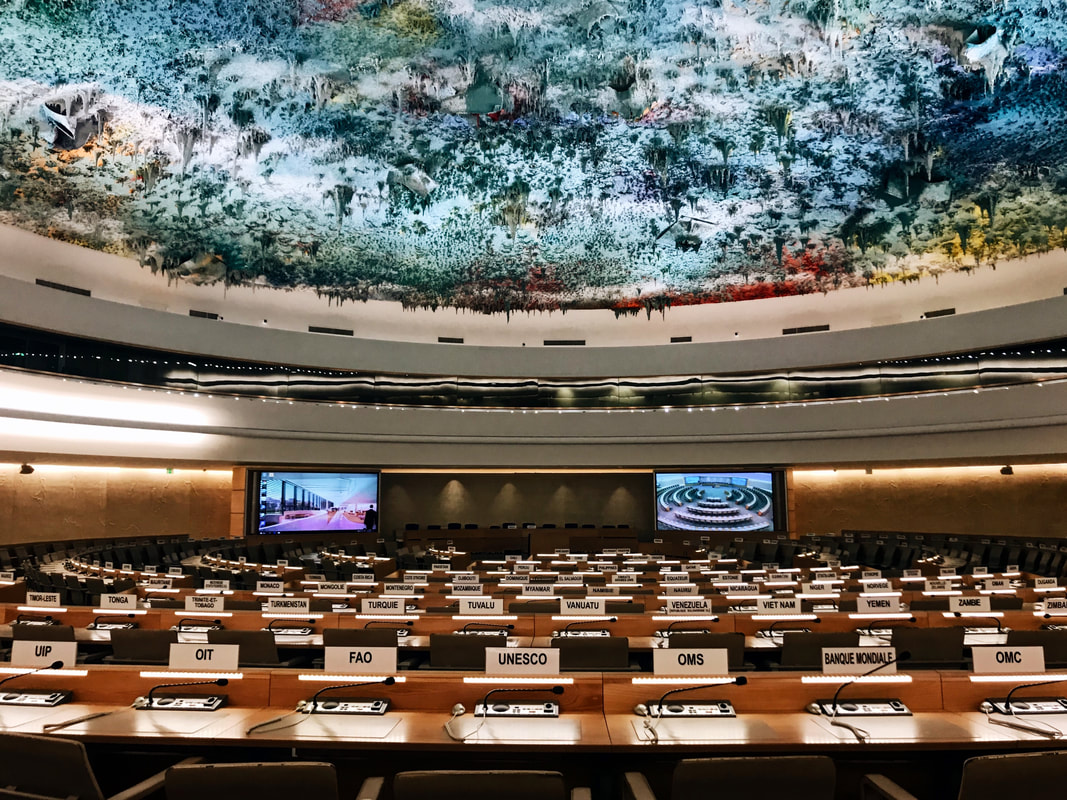
R U L E O F T H I R D S
Ever wondered why there is a grid option on your camera and phone? This it it, well... to help out composition anyway! This is a guideline that suggests the frame should be split into 9 equal parts and that by aligning your subject by these lines can create a more interesting composition and help create balance. A balanced photograph means that the subject doesn't just draw you to one direction only, and that there is balance. Here's an example:
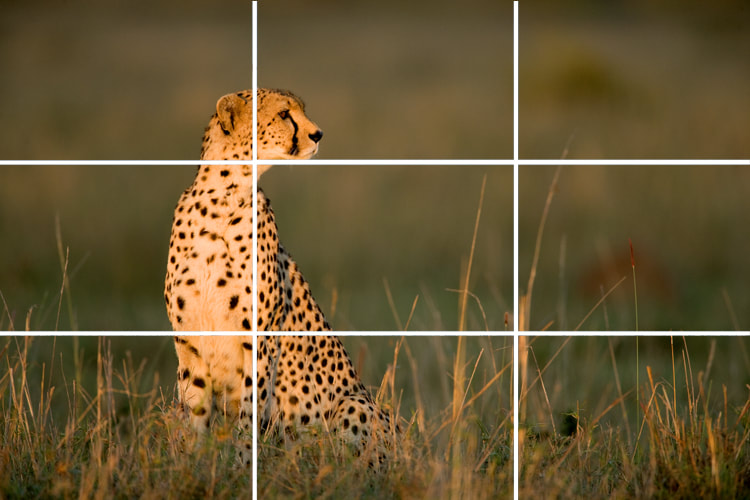
Image from https://www.photovideoedu.com/Learn/Articles/jim-zuckerman-on-composition-the-rule-of-thirds.aspx
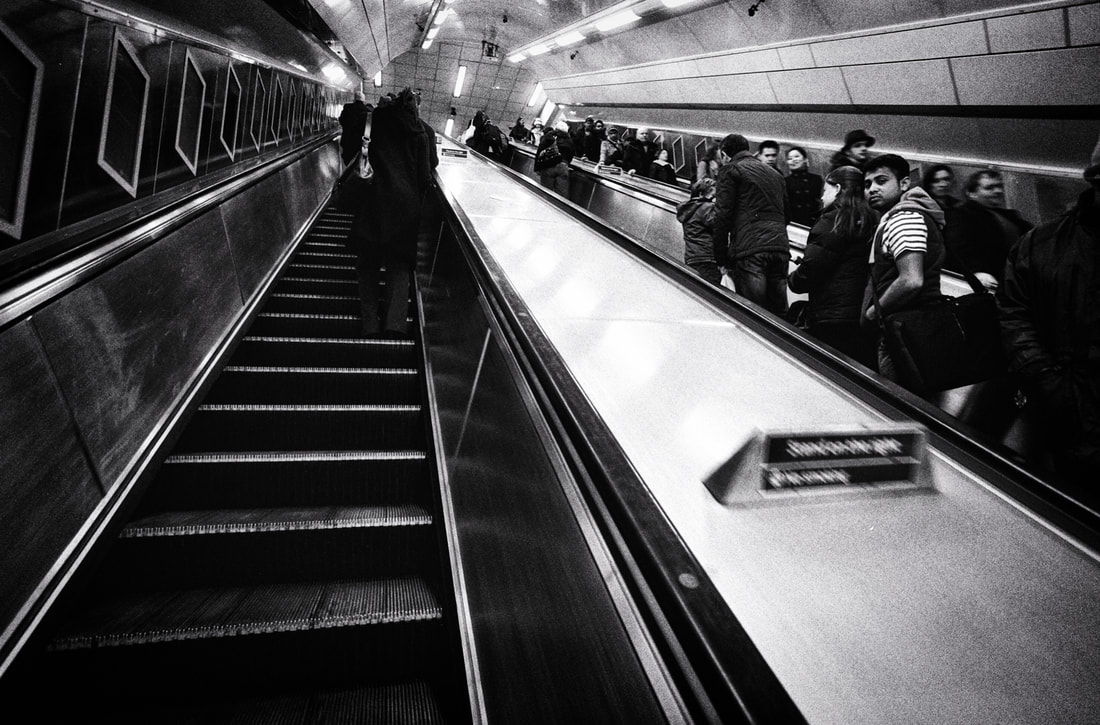
L E A D I N G L I N E S
Called leading lines for the very reason, they lead your eyes on a journey of their own and guide you in a specific path- which can help draw attention to a particular area or element as well as create structure. Here's an example: